Optimizing Microsoft SQL Server on the Galaxy Repository Node
This Tech Note describes configuration points for optimizing Microsoft SQL Server performance and management when it is installed on the Galaxy Repository (GR) Node.
Application Versions
- Wonderware Application Server 3.1 SP3 P1 and later
- Microsoft SQL Server 2005 and later
Anti-Virus Exclusions
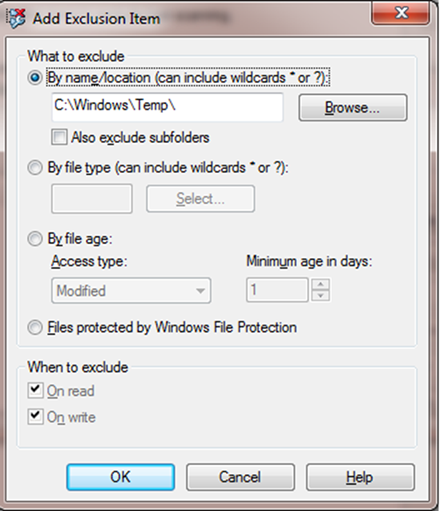
Ensure the Exclusions list includes Windows Temp files.
For example, you want to set up the following (this example uses McAfee):
- In the VirusScan Console, click Task, then On-Access Scanner Properties
- Click All Processes and click the Exclusion tab.
- Click the Exclusions button, then click Add.
- Add the C:\windows\temp\ directory (Figure 1 below)
Other Recommended Exclusions:
- Program Files\ArchestrA\Framework\Bin\CheckPointer
- Program Files\ArchestrA\Framework\Bin\GalaxyData
- Program Files\ArchestrA\Framework\Bin\GlobalDataCache
- Program Files\ArchestrA\Framework\Bin\Cache
- Documents and Settings\All Users\ApplicationData\ArchestrA (default setting, specified on WinPlatform editor's General page, History Store Forward Directory option)


General Settings
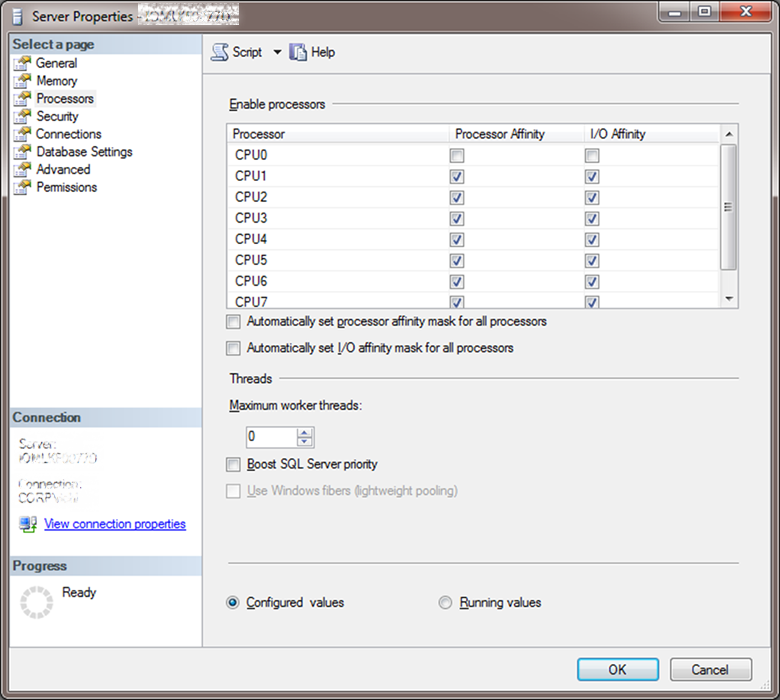
SQL Server Processors
- Uncheck Processor 0 – The IDE/aaGR will run best when SQL Server is not using this Processor.
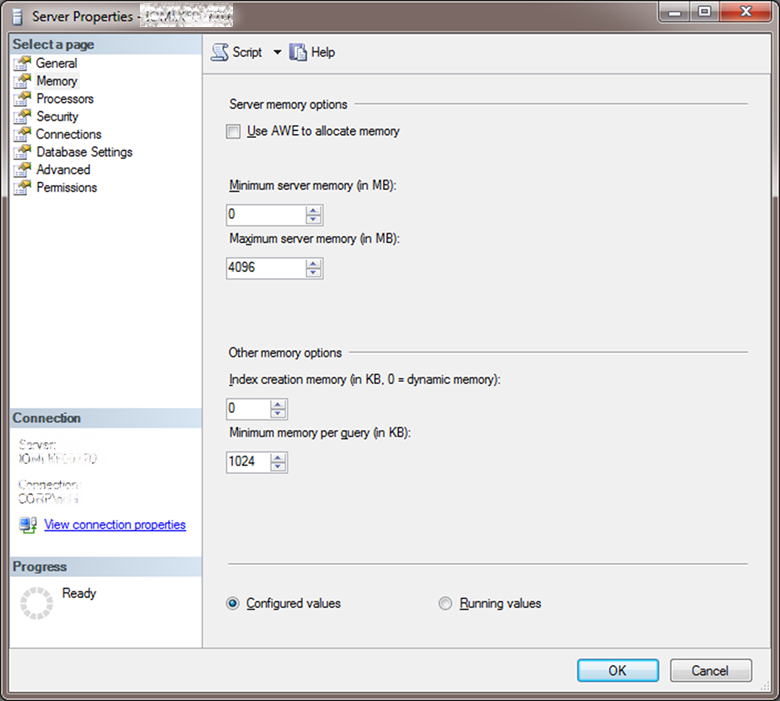
SQL Server Memory Settings
- By default, the SQL Server installation will set the RAM utilization to a very large number (2 Terabytes).
- SQL may give memory back to a process if requested.
- It is highly recommended to clamp the SQL Server maximum memory to at least 70% of the maximum available RAM.
General SQL Server Database Settings
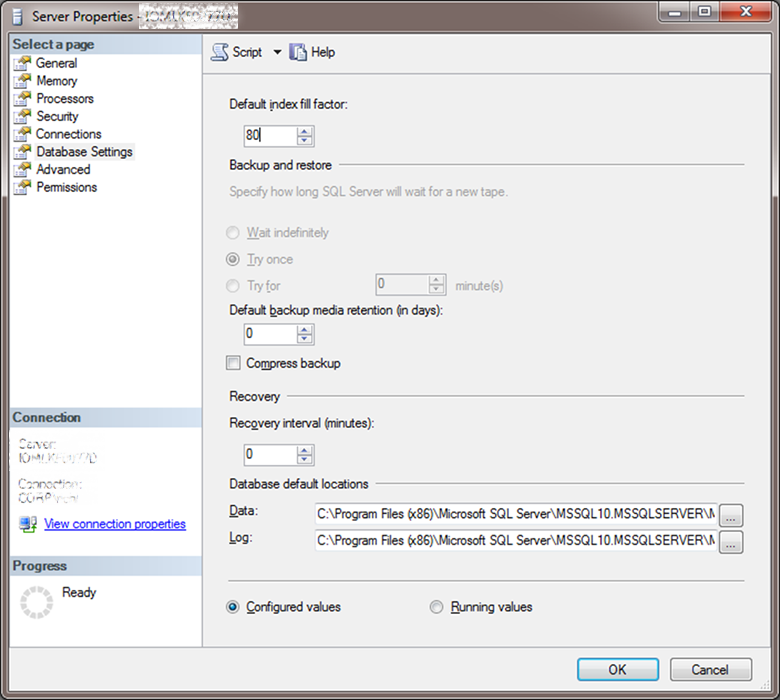
- Change the Default index fill factor from 0 to 80.
System Database Settings
Master Database Settings
- Verify the configuration of the database files.

- Modify the database files to minimize fragmentation.
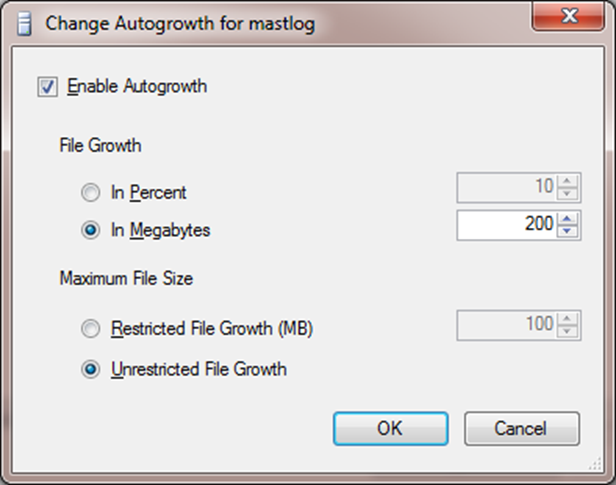
- Change the initial file size to 100MB for both database and transaction log
- Increase the file growth to a fixed size such as 200MB.
For example:
- If you have a database that is 50 MB in original size, enabling file growth by 10% will grow the database file increments of 5MB each time.
If your resulting database is 400MB, you then have the database file partitioned many times. - If instead you enable the database growth by size, you will have a resulting database file that is partitioned only 4 times in this case.
TempDB
- Configure the same settings for the tempdb (IMPORTANT).
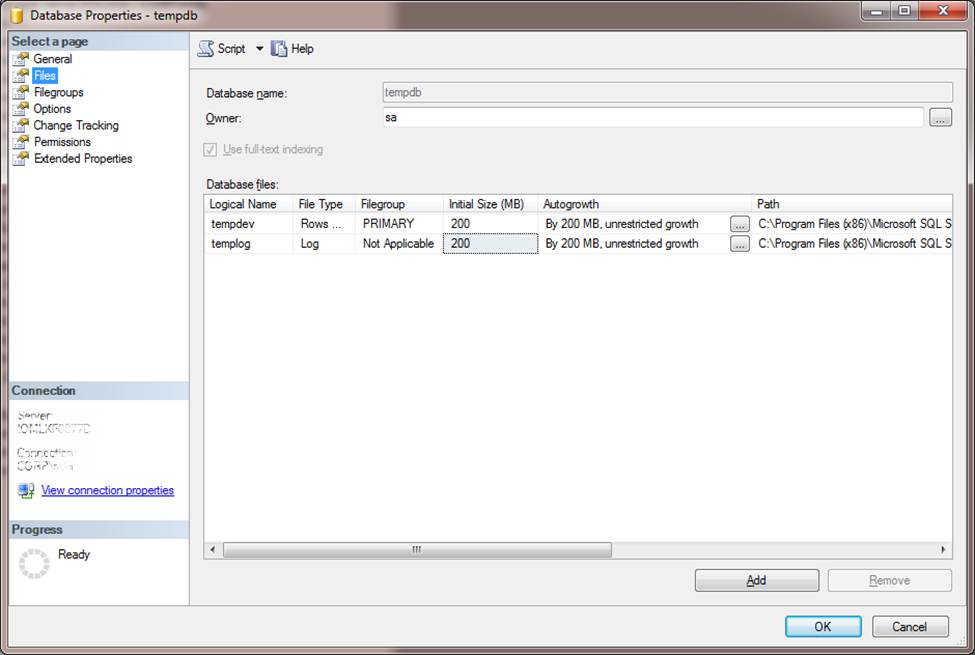
- Ensure the Recovery mode is set to Simple.
- (Optional) Move the tempDB path to a different physical hard disk
USE master
GO
ALTER DATABASE tempdb
MODIFY FILE (NAME = tempdev, FILENAME = ‘D:TempDBtempdb.mdf’)
GO
ALTER DATABASE tempdb
MODIFY FILE (NAME = templog, FILENAME = ‘D:TempDBtemplog.ldf’)
GO
Galaxy Database Settings
For your database (Galaxy database, example: PT_Master):
- Configure the initial size to 500MB for both MDF and LDF.
- Configure the autogrowth to 500MB for both MDF and LDF. This helps reduce fragmentation.
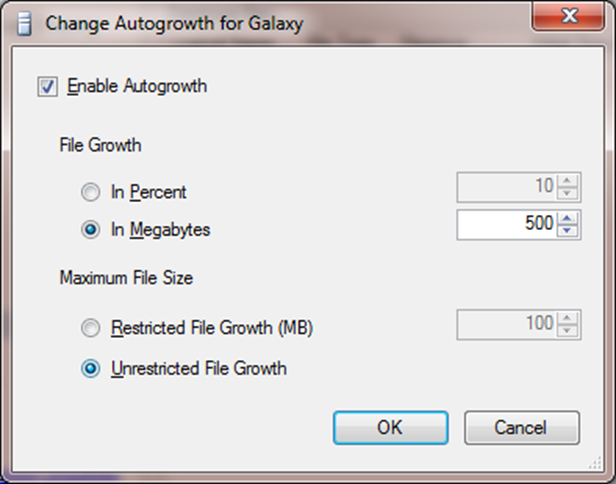
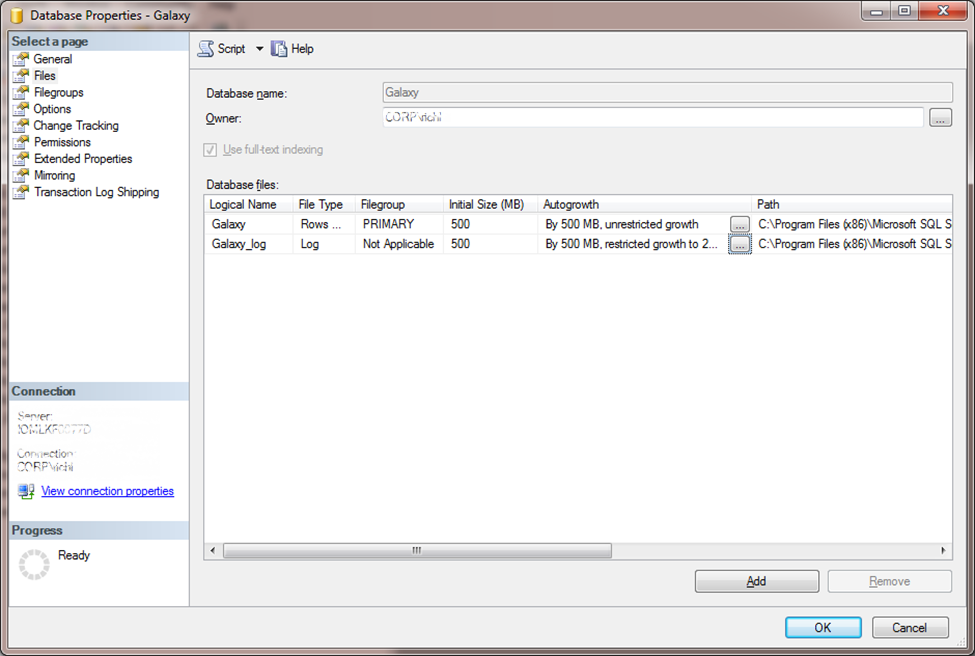
- Ensure recovery mode is set to Simple and stop/restart SQLServer.
Proxy Polling Settings
The following setting determines how often to refresh the IDE Galaxy Tree.
We do not recommend changing unless a big operation is going to occur like importing thousands of objects or migrating. The setting should be reset when finished, otherwise when you perform operations the tree will not display the correct state, such as Checked in.
- Change the setting in the registry (as follows), to 10 seconds
Windows Registry Editor Version 5.00

[HKEY_LOCAL_MACHINE\SOFTWARE\Wow6432Node\ArchestrA\Framework]
"ProxyPollingRate"=dword:00002710 (10000)
- Set it to normal:
Windows Registry Editor Version 5.00

[HKEY_LOCAL_MACHINE\SOFTWARE\Wow6432Node\ArchestrA\Framework]
"ProxyPollingRate"=dword:000001f4 (500)
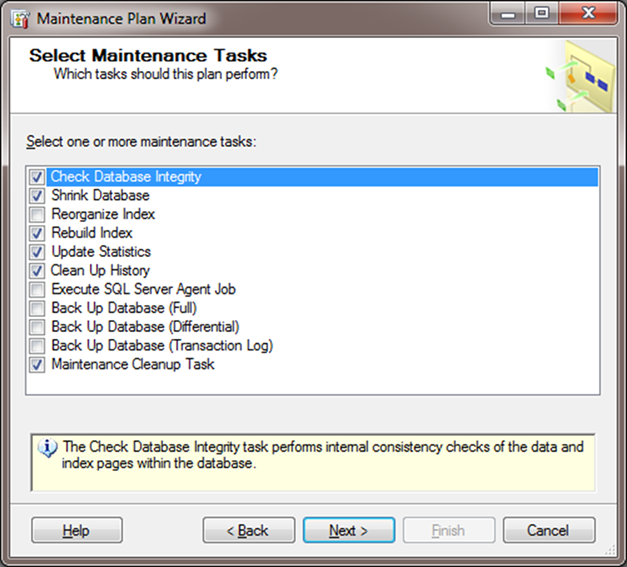
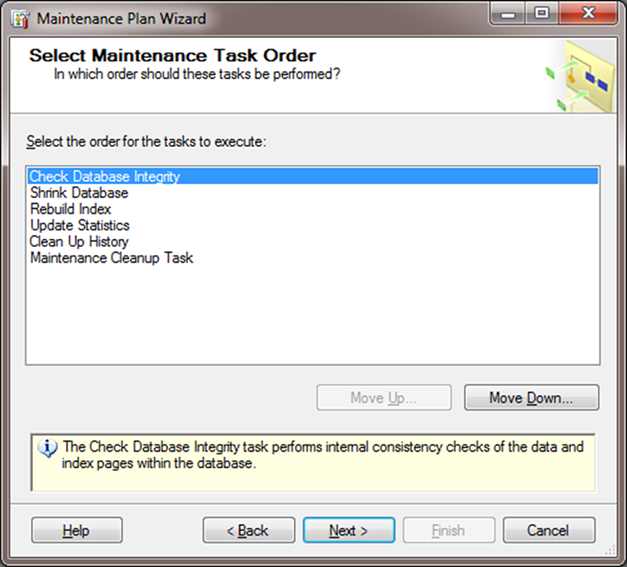
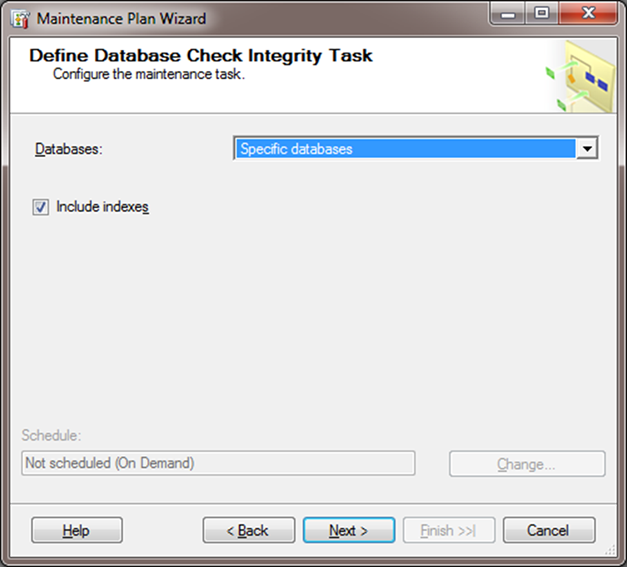
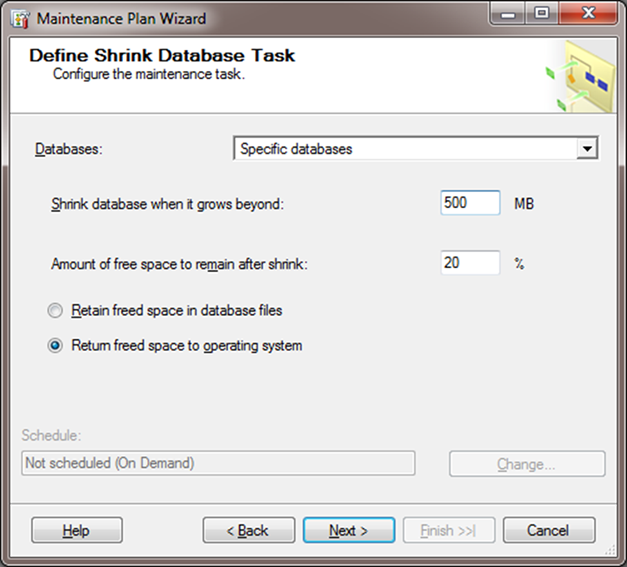
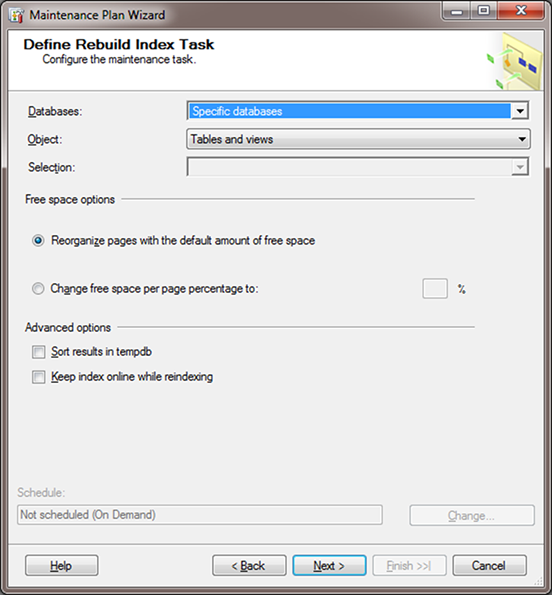
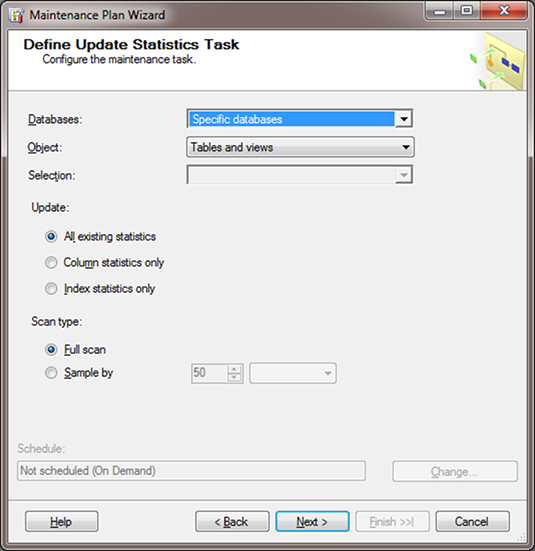
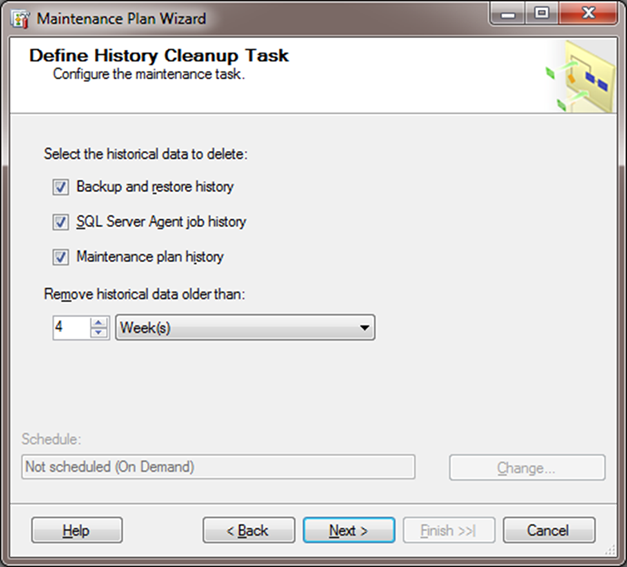
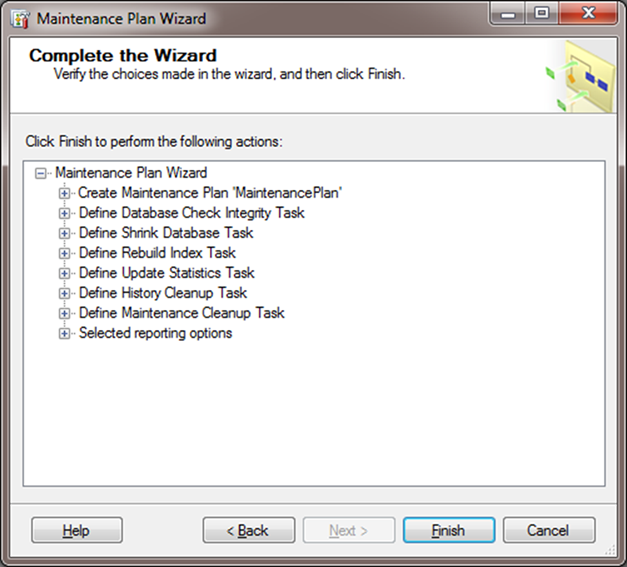
Maintenance Plan
Create a Maintenance Plan in the Object explorer under Management. Run this task weekly to keep the database running smoothly.
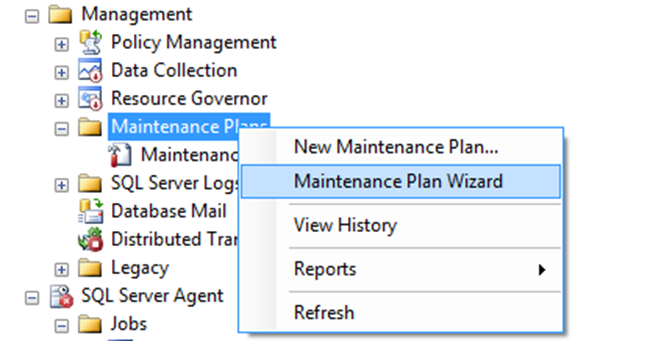
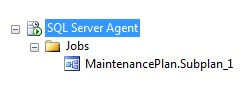
When you complete the Task Definintion, the Maintenance Plan appears in the Jobs folder of the SQL Server Agent.
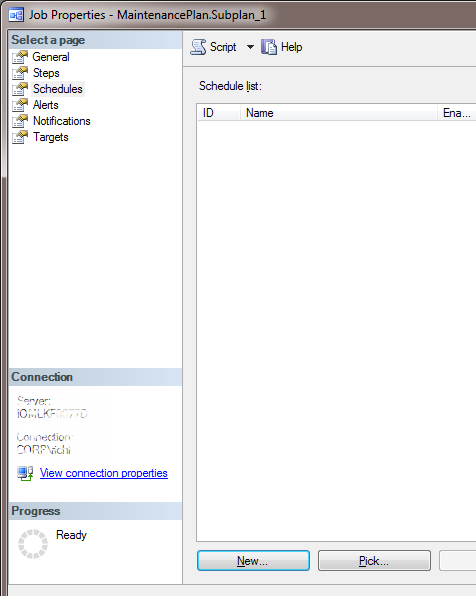
Right-click the Maintenance Plan and click Properties, then Schedules/New.
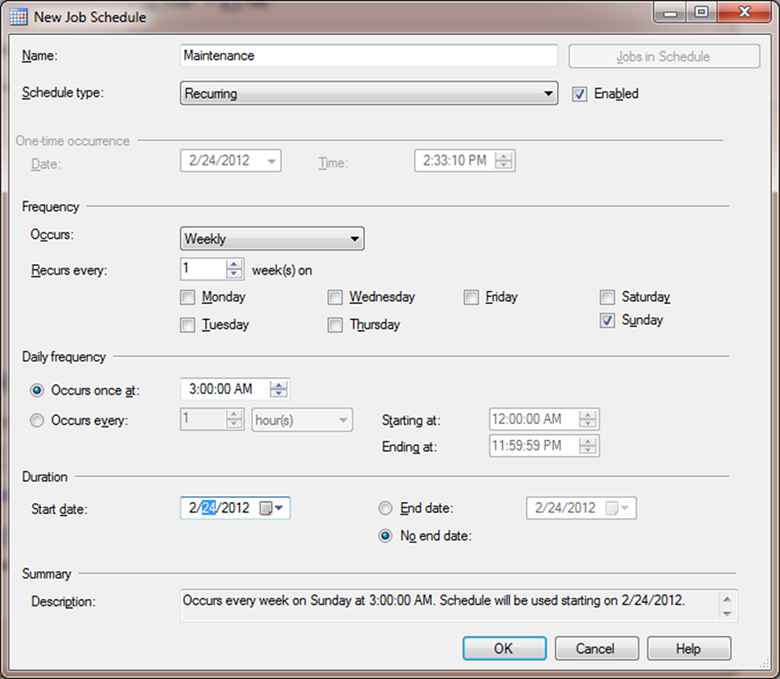
Set up the schedule according to your needs
No comments to display
No comments to display